Showing posts with label Fancy Nancy Nifty Tip. Show all posts

6.24.2016

{fancy nancy portable quilt design boards inspired by lori holt}

First, 100% credit goes to Lori Holt of Bee In My Bonnet for her great idea to make smaller, portable design boards to use during quilt block design and construction.

This is my Fancy Nancy version using basting spray and Duck tape to construct my boards.

Materials needed -
Foam core board (use your coupon at Hobby Lobby, Michaels or Joanns)
Basting spray (I like 505 spray), glue gun or craft glue
Duck Tape - it comes in a wide variety of patterns (use your coupon at Hobby Lobby, Michaels or Joanns)
Batting (great use for all of those odd scraps)
Cutting mat, ruler, pencil and scissors

With your quilting ruler as your guide, cut your foam core board to size.  You can use a rotary cutter with an old blade, a sharp knife or exacto knife.  Just be sure to have your cutting mat underneath your board.  I have found 15" squares to be very useful.  I did make one board using the whole piece of foam core for those really large quilt blocks.  If you do teeny, tiny piecing you could make a smaller board.  Make what you'll use.  There is no "wrong" size.

Now cut a piece of batting 1/8" smaller than your board.  If your board is 15" square, cut your batting 14 7/8" square.  I like doing this for two reasons.  First, I have found it much easier to cut your batting first rather than try to trim it flush to the board after it's glued.  And second, cutting your batting slightly smaller gives you a sharp edge when you apply your Duck Tape.


On the "back" side of your board, measure in 3/4" and draw a pencil line on all four sides.  This give you the perfect amount of Duck Tape on both sides of the board.


Take your board outside and spray the whole "front" side of your board (the side without pencil markings) with basting spray.  Or you can use a thin layer of craft glue or your glue gun glue around the edges to secure all four sides of your batting to your board.


Secure your batting to the board.


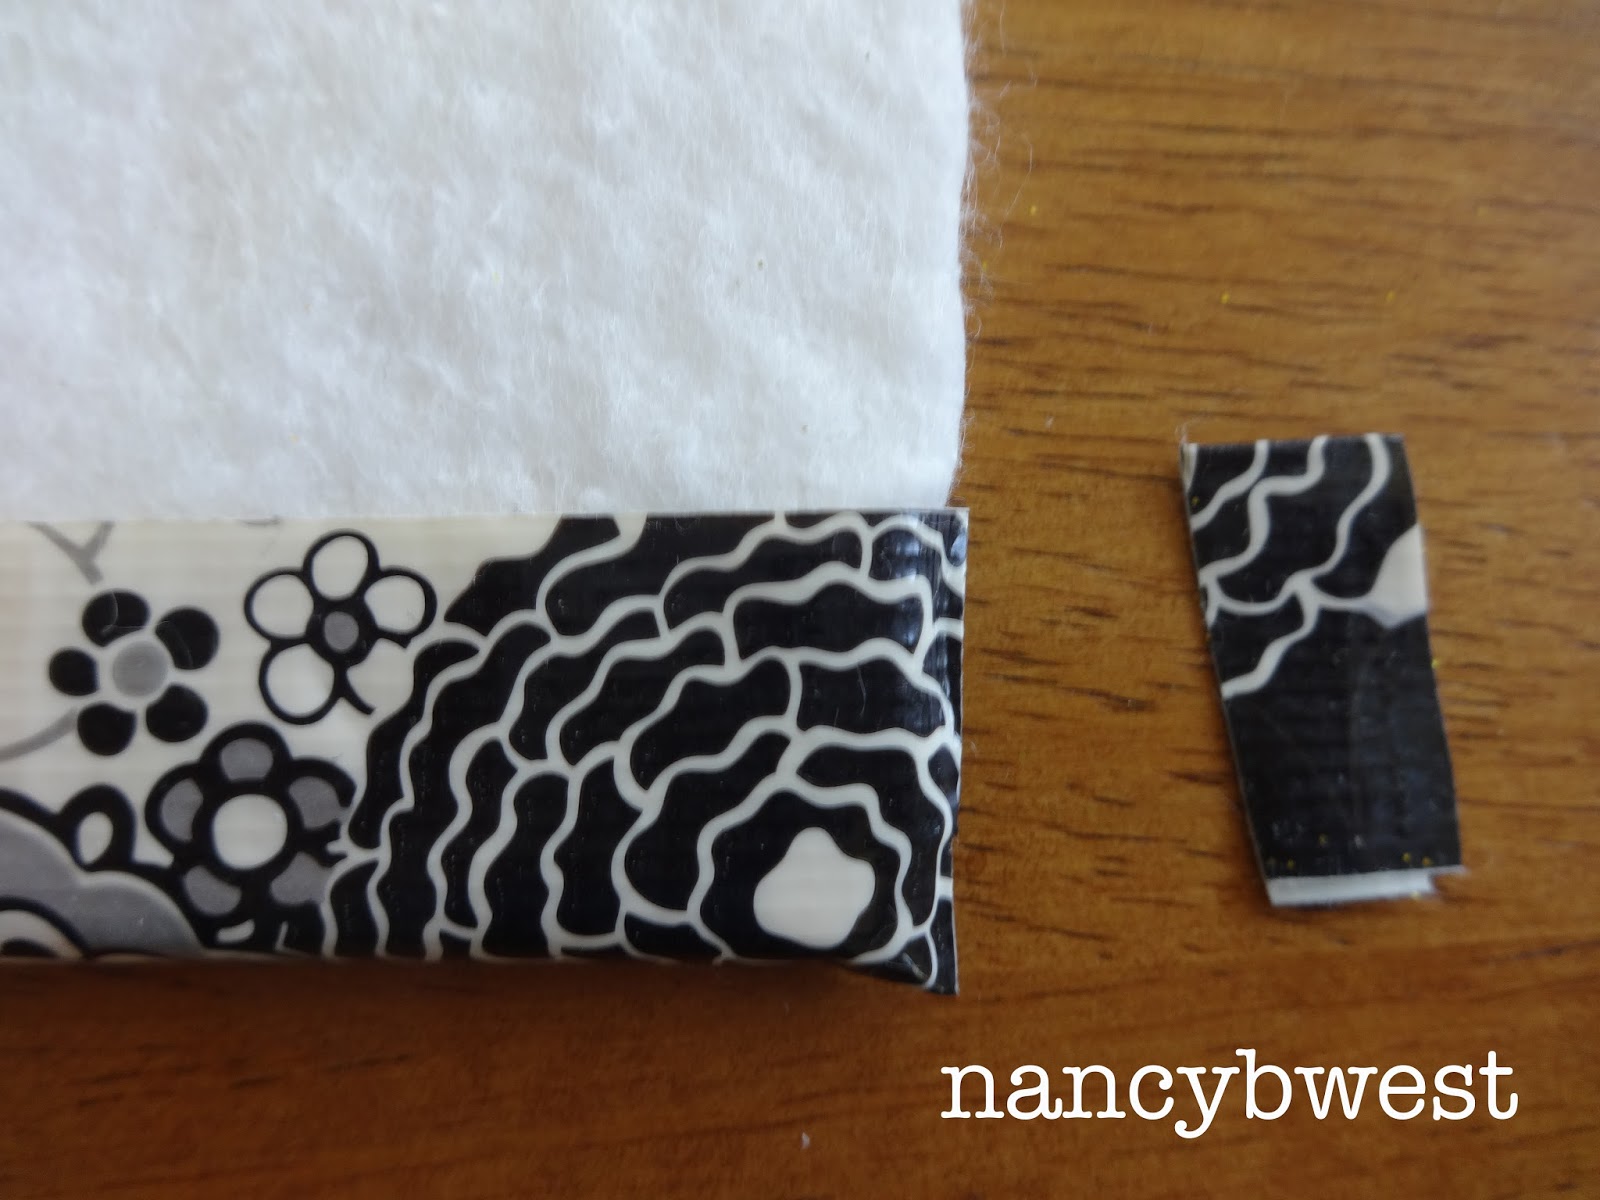
Flip your board over to the wrong side and line up a piece of Duck Tape just a hair beyond your pencil line.  Make sure that it extends about an inch on both sides.


Turn your board over and bring the Duck Tape to the front and press with your fingers to secure.  On either end squeeze the overlapping edges together and cut next to the board.


Repeat on the opposite side.


On the two remaining sides you will do the exact same thing EXCEPT this time you will notch the tape that extends on the BACK side of the piece.  This will allow you to fold the tape back on itself and will give you a clean corner.


Sadly, I have to report that the Duck Glitter Tape was a huge disappointment.  It did NOT have the same "stick" as the other designs.  I ended up having to go back and glue my corner pieces.  I'll use my one Fancy Nancy Glitter Duck Tape board but I won't use the glitter tape on any others.  Duck Tape, I had such high hopes . . .


This version of design boards does not require an iron.  I think my dislike for the ironing part of quilting harkens back to my childhood days when everything was cotton and so everything needed ironing (today it doesn't seem to matter as much if things are ironed but I still love the smell of my ironed pillowcases and the look of a well pressed dress shirt).


I spent many an hour seated at my Mom's Ironrite (it probably wasn't that often but it sure seemed like it!) ironing pillowcases and imagining that they were the curtains being raised on "Let's Make A Deal" or "Queen For A Day" to reveal the Grand Prizes.  Don't you love the sales pitch?!?  The end of "home's last drudgery!"

5.23.2016

{fancy nancy flying geese ruler}

I love my Quilt In A Day flying geese rulers!

I decided that for quick reference and to save me having to retrieve the instructions every time I use my rulers, I would type up the dimensions of the squares needed for the two sizes on each ruler and tape them to the ruler.  (If you saw my sewing/creation lab, you would understand how useful this has been.)

First, I pasted a picture of a "goose" and the measurements for both rulers to a document.  I made it small so they wouldn't obscure the guidelines on the ruler.


Second, I printed my document and trimmed down my squares.


Third, I turned my rulers RIGHT SIDE FACING DOWN and used wide, clear packing tape on the WRONG SIDE of my square (I made it small enough that I had a thin edge of tape extending beyond my square on all four sides) to adhere my square to the WRONG SIDE of my ruler.


Fourth, I turned it over, admired my genius and went back to cutting the gigantic flock of geese that I need for a very special Fancy Nancy quilt.


I'm hoping that by taping it to the wrong side of my ruler underneath my gripper strips and protecting it with the layer of packing tape, my instructions will hold up for a very long time.


3.16.2014

{ buttons }

A very nifty tip for placing buttons
before you start stitching.

Let me introduce you to one of my
ALL TIME FAVORITE notions -
* * * Roxanne's Glue-Baste-It * * *


After I decided on my layout
for my Loving Hearts stitchery,
I put a dot of Roxanne's magic glue
on the back of each button.
This stuff dries FAST and clear.
One dot held those buttons firmly in place.
It can be used anywhere you need a pin,
extra 'finger' or a 'temporary' basting.
It comes out in the wash and this little bottle
lasts a very long time.
I continue to find new uses for it.
Check with your local quilt store
and if they don't carry it, request that they do.
Or you can always check online.

2.19.2014

{ fancy nancy's nifty quilt row markers }


As I began to quilt more,
I needed a practical yet fancy way
to keep track of my quilt pieces and layouts.

I wanted something a little more elegant than
scrap paper or post it notes.


These sweet, original creations of mine are
my Fancy Nancy solution to my dilemma.

You'll need pins (I love corsage pins),
alphabet and/or number beads,
decorative beads and
a fast setting glue.


Decide on your design, put a dab a glue
right below the head of the pin,
slide the first bead (alphabet or number) on, 
a little more glue and your last bead.
I lay them down on a piece of aluminum foil
(just in case there's any glue leakage) to dry.

My first set was done with shorter pins and
I soon realized that by the time I put the
number or alphabet bead and an anchor bead on,
I didn't have much pin left.


My next set was done with longer pins with colored heads.
Better, but I still wished for 
a little more 'pin' on my marker.

Then I found corsage pins at Joann's
(you can find them at craft stores and Walmart).
They have a beautiful head and a LONG 'pin'.


Perfect!

Beads come in alphabets and numbers,
colored, clear and white.
I love having a little bit of everything.


I especially have loved the alphabet set
for quilts that have pieces labeled by letters.
My snowmen went together quickly
with all of my pieces labeled.