2.06.2014

{ countdown to heart day - day 6 }


I am the keeper of my grandmother's button box.
I've often wondered about the story behind each button,
especially the unusual ones.


In the spirit of button boxes, I decided to do a Button Heart project.
I found this great frame a couple of years ago at the grocery store for $1
(if you have the time to browse, you never know what you can find
at the Dollar Store, Walmart or the grocery store.
Just go with an open mind and sharp eyes.}

I loved the frame because it had the heart-shaped plastic rimmed 'mat'.
You can still do a heart shape on a flat piece of card stock or foam core
cut to the dimensions of your frame.


I wanted a fairly uniform white border and so I went
back to the grocery store (you read that right, the grocery store)
and bought a package of white buttons for $1.50.
I gathered the red buttons and the remaining white buttons
from my own button box but, if you don't have a button collection,
there are thousands of darling buttons
you can buy at Walmart, Hobby Lobby, Michaels or any fabric store.


I used a clear drying white glue to glue my buttons to the backing
once I had decided on my layout.
I tucked in a few heart buttons just because.


I actually display this Button Heart year round in my family room
atop a shelf holding an antique quilt, a gift from my sister.
If you look closely, you can see my grandmother's button box
next to the Button Heart with a bird perched on top.


{ I can sew a rainbow }

I have fallen in love with quilts 
made from solid colored fabrics.
I love the weight and feel of Kona Cottons.


As I build my stash of Kona, it has become clear
that there is no way I can remember all of the colors
and there is no labeling on the selvage.
{There are currently 271 colors offered by Robert Kaufman}


I came up with the perfect solution.
As soon as I buy a color,
I take a fine point Sharpie {black or brown}
and write enough of the color name
on the selvage on one end of the yardage
so that I can identify it later
BEFORE I wash the fabric.
After I take it out of the dryer,
I trace over the name again if necessary.


When I go to cut a piece off the fabric, I cut from the opposite end,
preserving the name until the last couple of inches.

I just wish I would have thought of this sooner -
I have some 'orphans' that I don't remember their names.
Who knew there could be so many shades of blue!

2.05.2014

{ countdown to heart day - day 5 }


When we pulled up our deep Pleasant Grove roots and moved to Provo,
we brought a piece of Pleasant Grove with us
and used it on the exterior of our house.
{Actually Mr. W. picked up 35 pallets
of orchard rock from my Dad's Battlecreek orchard.}
If you look closely, you can see the heart-shaped rock
that I had the masons place next to our house number.

This fun wreath is made from Christmas clearance items.
I had a heart-shaped wreath base from an old willow wreath.
You could make a heart shape from a wire hanger
or a heavier gauge wire.
I wrapped two packages of red loopy garland
{which I paid $2 for} around the wire base.
Then I wrapped a strand of clearance Christmas lights
around the heart and finished it with a red tulle bow.
Total cost for the wreath was $3.50!


I leave it on day and night
and silently send my love across the miles
to my Hermana West in Uruguay.


2.04.2014

{ heart day countdown - day 4 }


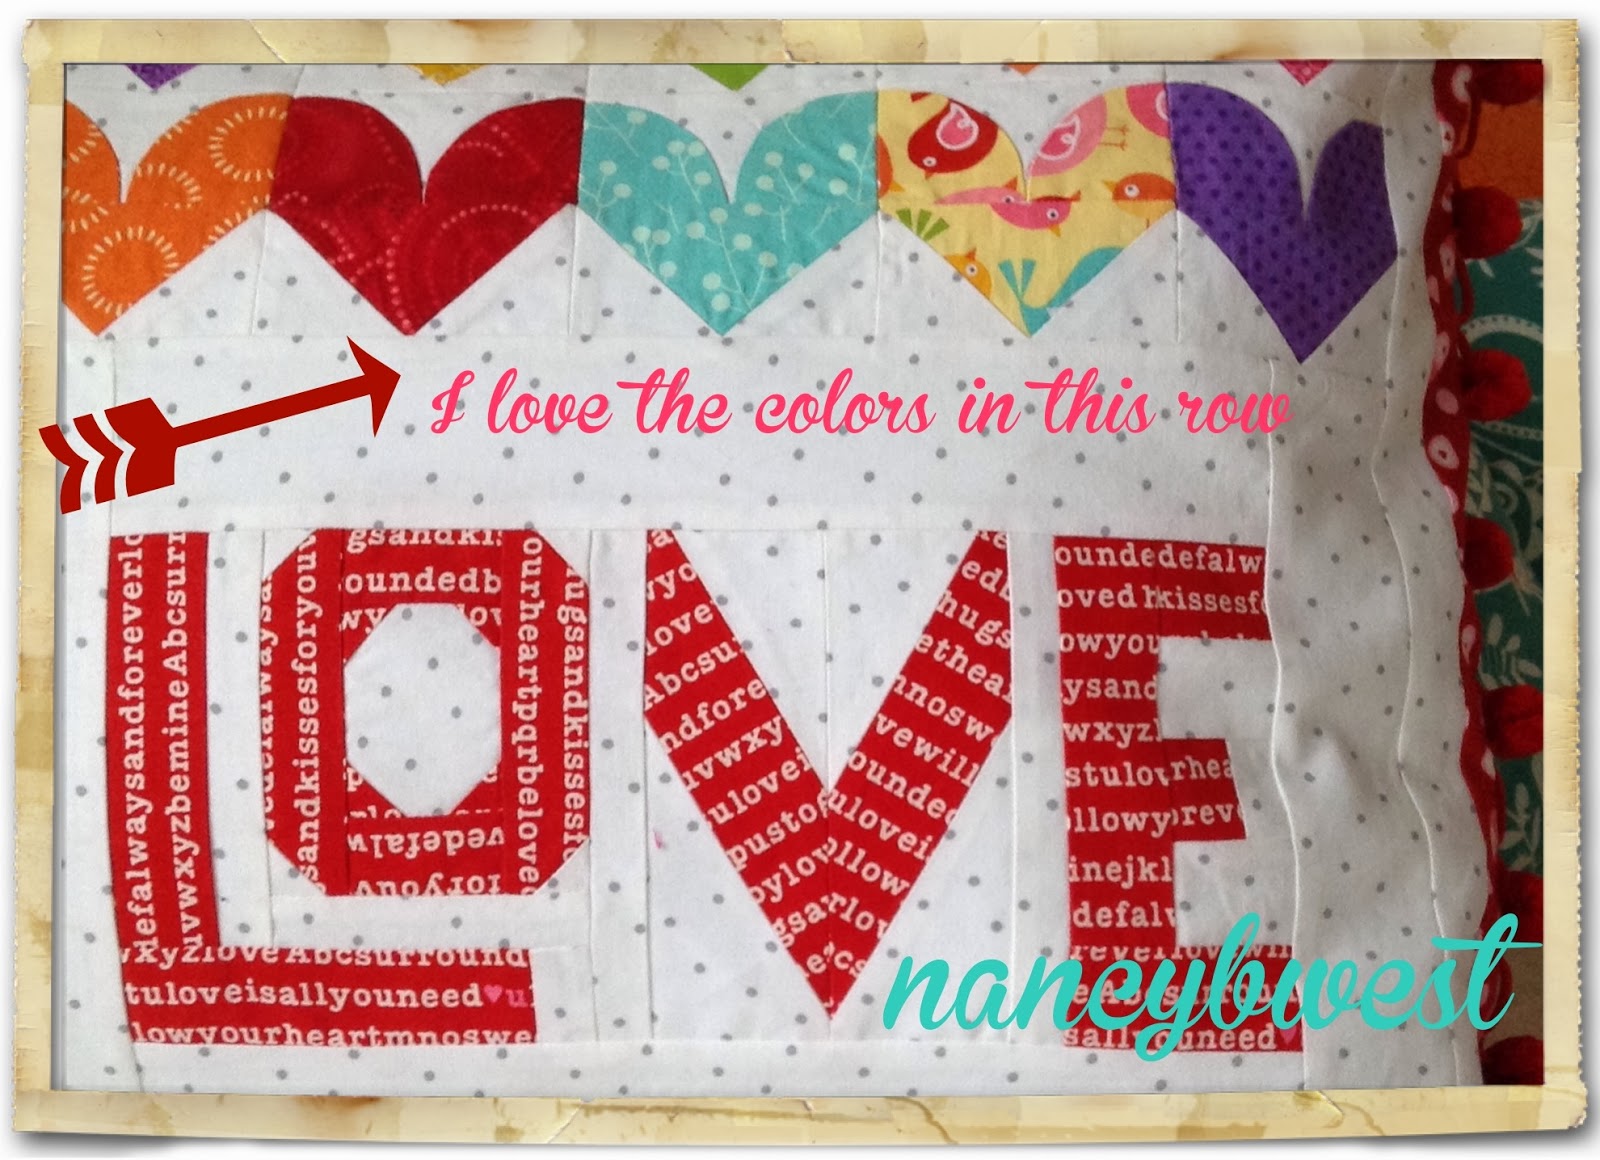
I fell in love with this pattern.
I fell out of love as I made itty bitty hearts
that involved itty bitty curves . . .
but, not one to give up easily,
I took a deep breath and kept sewing.

(My great grandmother, Annie Flygare,
created the quilt that hangs at the head of my bed.)


I pieced the pillow as shown in the pattern
but felt that the white with gray dot
needed a 'frame' around it.

I love the birds!

I knew that the red loopy pompom trim
would be PERFECT!
I had been hoarding saving it
for just the right project.
The pattern did not called for a border
but I felt the white/gray dot needed one.
I added a 1" strip of red and pink heart fabric
and I think it's the finishing Fancy Nancy touch!


I plan to place it on my bed every morning
as a reminder of all of the love
that has blessed my life.

Look closely for the 'love' words in LOVE
the fabric is fromthe Moda Surrounded by Love line

In the spirit of full disclosure . . .
I do not plan on making any more
itty bitty hearts in the near future.
It felt like my attempts at
sewing Barbie clothes.
Even I have my limits :)

The back of the pillow with an 'envelope' closure

But . . . I do plan on making more LOVE blocks
to use on other Fancy Nancy projects.
Stay tuned.

The magazine that contains the pattern (February 2014)


2.03.2014

{ heart day countdown - day 3 }


This sweet stitchery celebrates
Be #4 - Be True


President Hinckley reminded us
to be true to the faith and
true to the truth.

And I am blessed to have a sweetheart
who is true to my heart.

2.02.2014

{ heart day countdown - day 2 }

This sweet little pillow is a Shepherd's Bush design.


It is in honor of my Valentine, Mr. W.  
He unofficially proposed to me 37 years ago 
on Valentine's Day
(we waited until March 22nd for 
the official announcement in hopes that 
my mother wouldn't have a heart attack).

I was smitten those many winters ago 
and remain so to this day!

2.01.2014

{ heart day countdown - day one }

In honor of Valentine's Day 
(one of my favorite holidays dating back 
to elementary school), 
I am sharing a February Fancy Nancy Original 
each day until the 14th.

I loved the shaded thread and the dainty button 
on this very February-ish needlework! 


The beginning of February always seems to mark 
the turning point of winter with hints of warmth 
and the pastels of conversation hearts 
on the grocery store shelves. 
 I would alway read each heart 
and carefully select just the right sentiments 
for each class member.  
I'm not sure how many fellow classmates 
were even aware of my efforts but it mattered to me 
to make sure that 'True Love' 
did not end up in the wrong envelope!